
Using Live Booleans for Creating Stunning Art
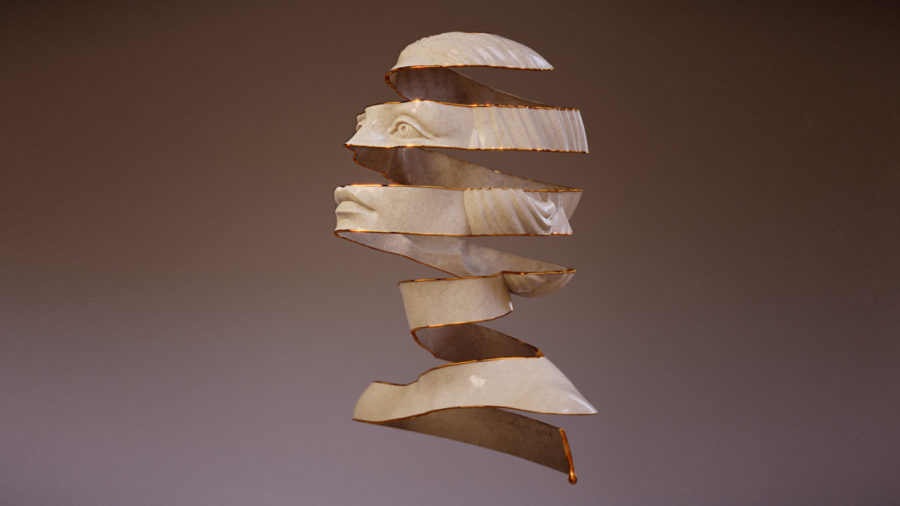
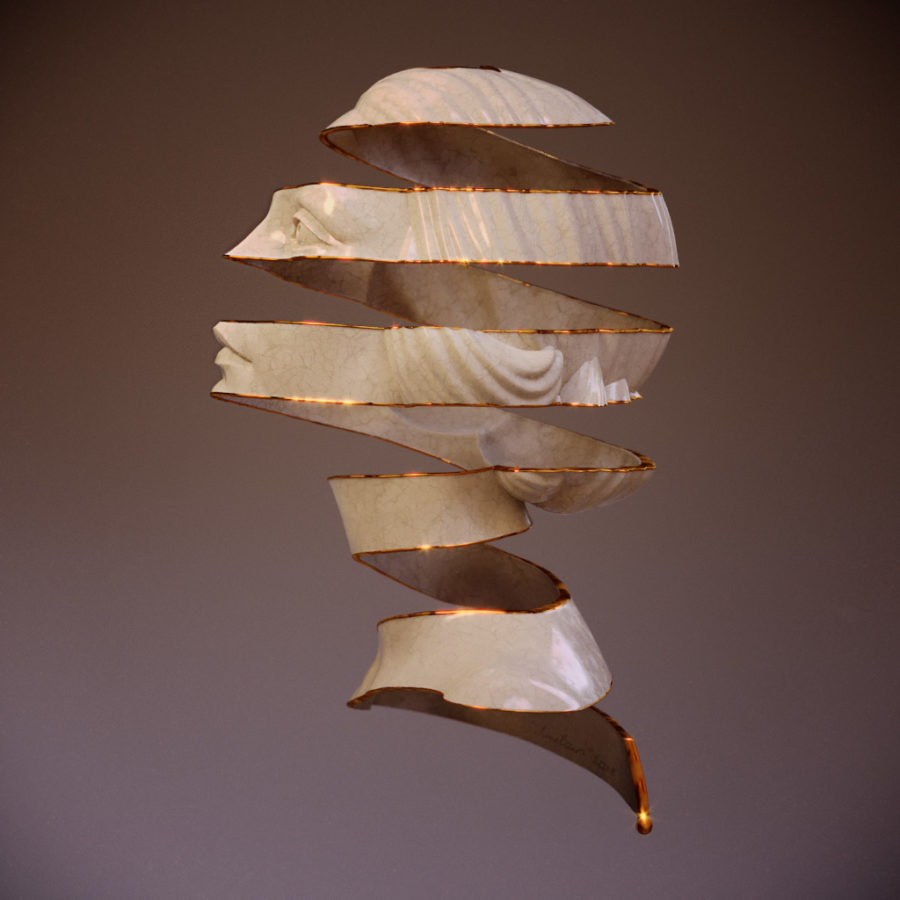
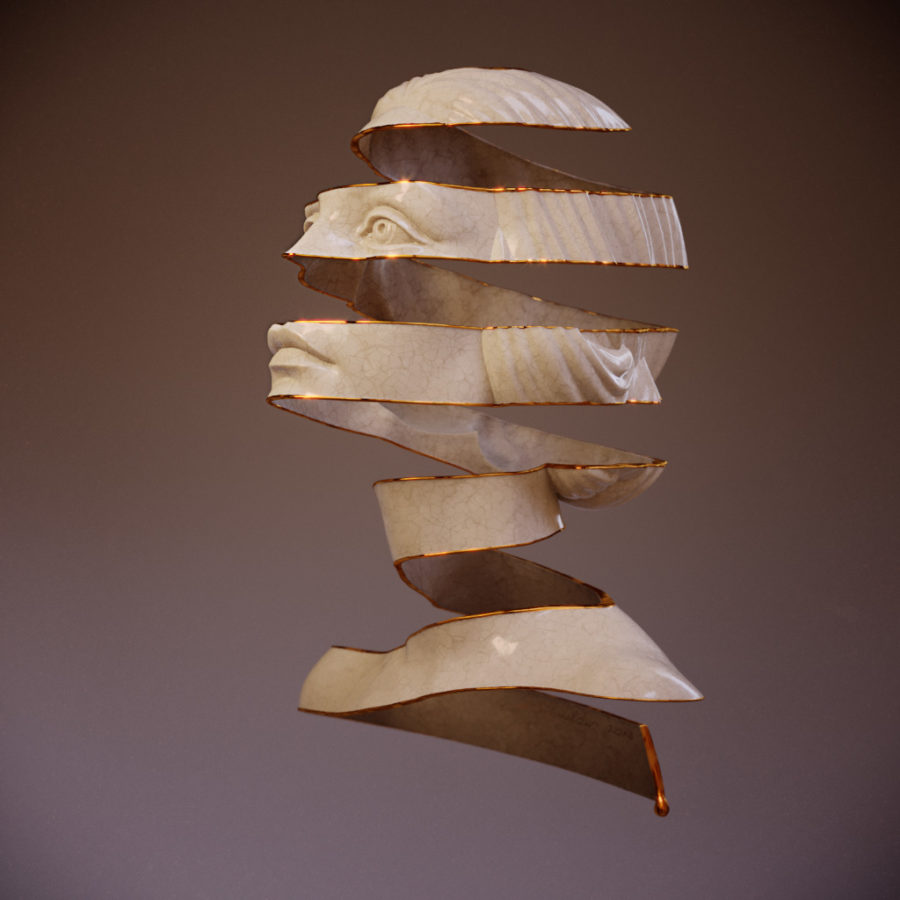
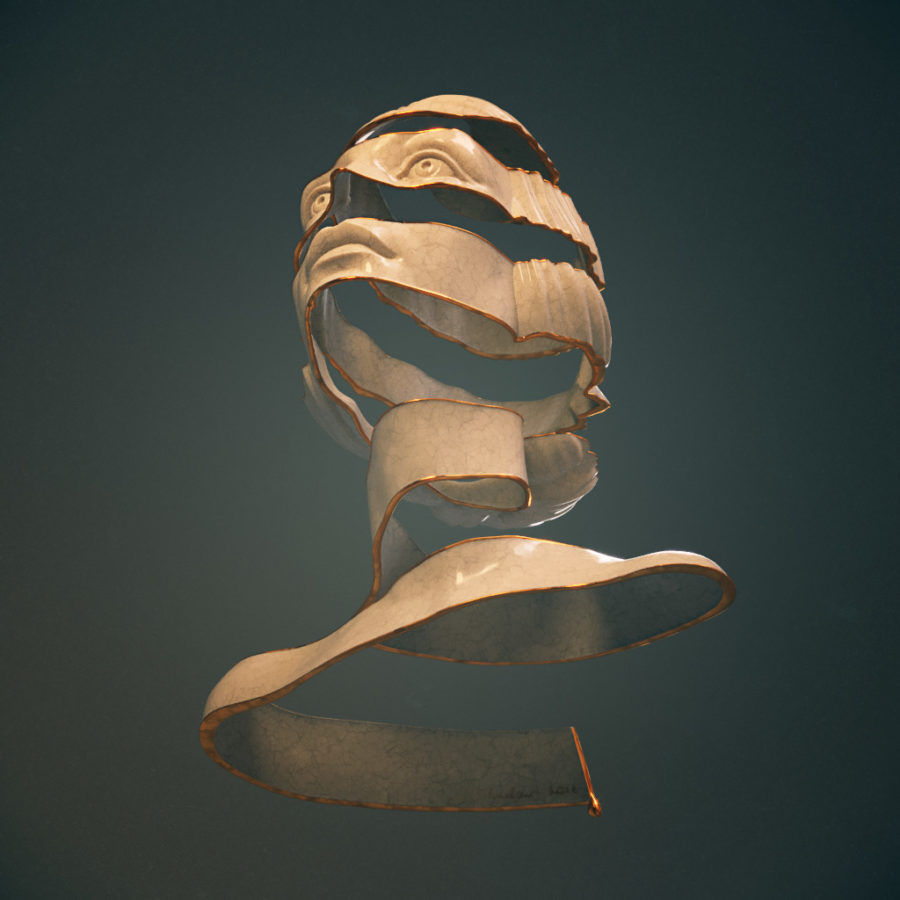
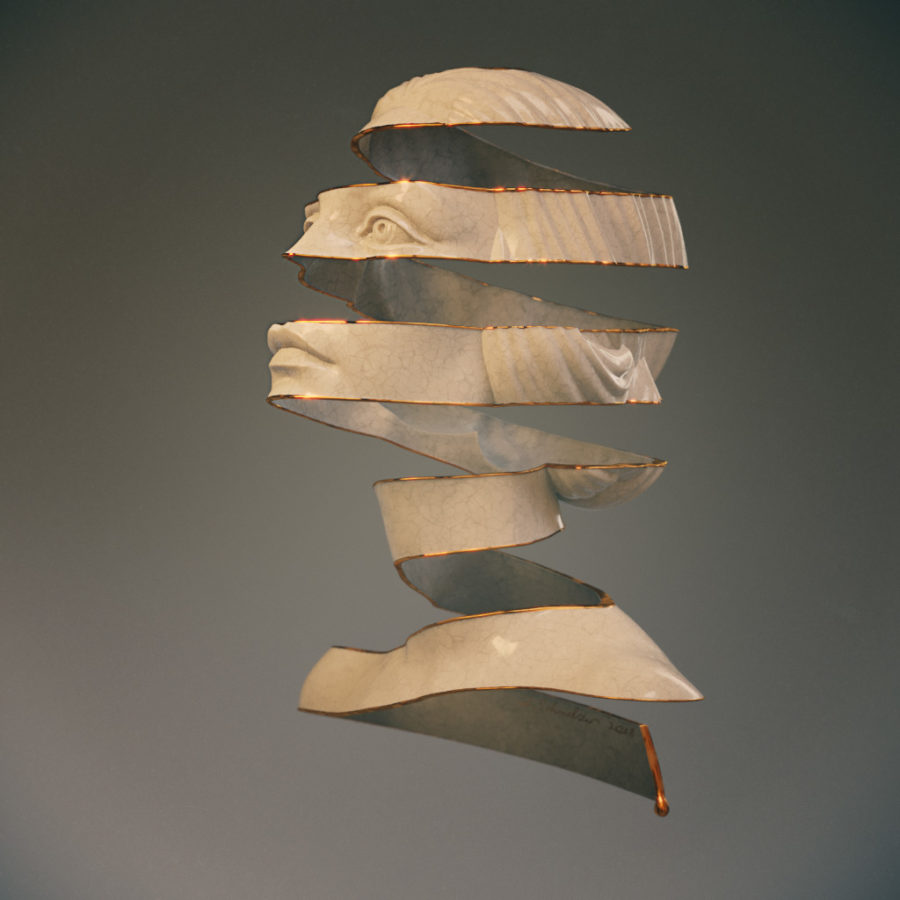
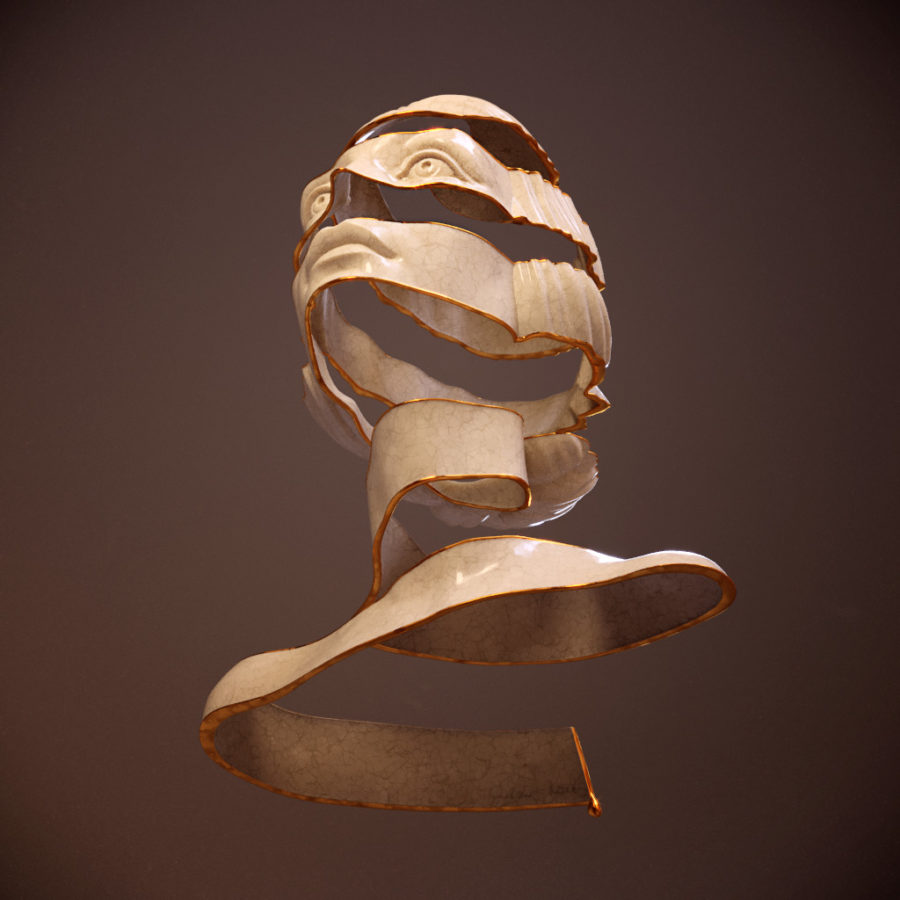
In the wonderfull presentation for ZBrush 4R8 Joseph Drust showed the workflow for Escheresque portraits. I`ve been enormously hyped and sculped one right after the presentation. I marveled how nicely the LiveBoolean feature works and then forgot about the sculpt for some time. Lately I`ve got my hands on a Beta for ( yet another) renderer grabbed the bust and rendered it Corona for C4D.
I found the workflow of the ZBrush 4R8 presentation really nice and summed it up in a small tutorial. Enjoy. 🙂
Tutorial
Please follow the chart to have a step by step guide on how to make the “escheresque” portrait in ZBrush.
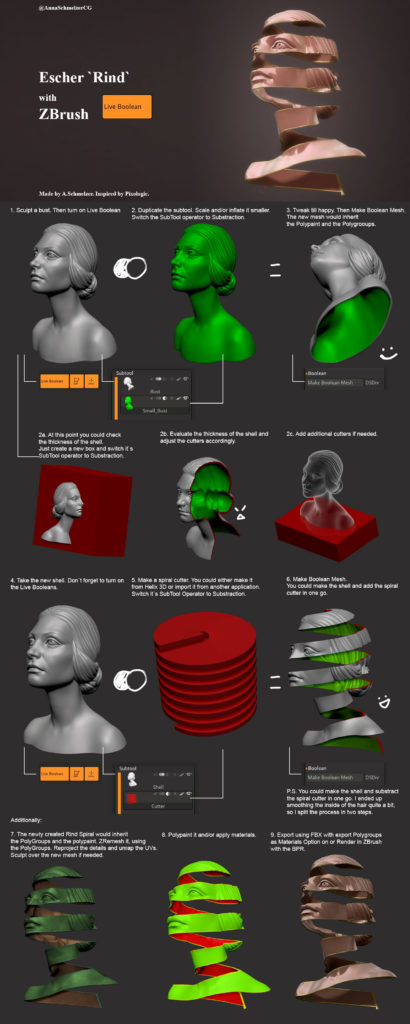
Tutorial Chart
Material Generation in Corona Render
Corona Render
First I want to share a few thoughts about Corona Render. I recently swapped to Cinema 4D a few weeks ago and made it my main 3D application or integration software as I like to refer it to. With every new 3D package comes the question which render engine to use. Luckily I must say Corona went to Beta early February for C4D and I had to try. I was immediately impressed. Mainly by the combination of Coronas native integration in Cinema, its simplicity and most important quality vs speed ratio. With the full integration I’m allowed to use all of Cinemas build in procedural noises and features. This allows for fast material setup wand a lot of flexibility in fine tuning material looks.
Building the Shader
Reference Material
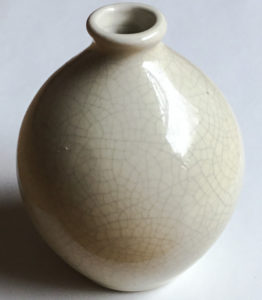
Ceramic Vase Material Reference
First of all I needed to decide on a material look for the design. I have found a vase in my home that exactly shows the look that I’m after. Mainly we look at the patterns of cracks inside the material. They look very regular with a Voronoi structure so we can definitely work with that.
Diffuse Channel
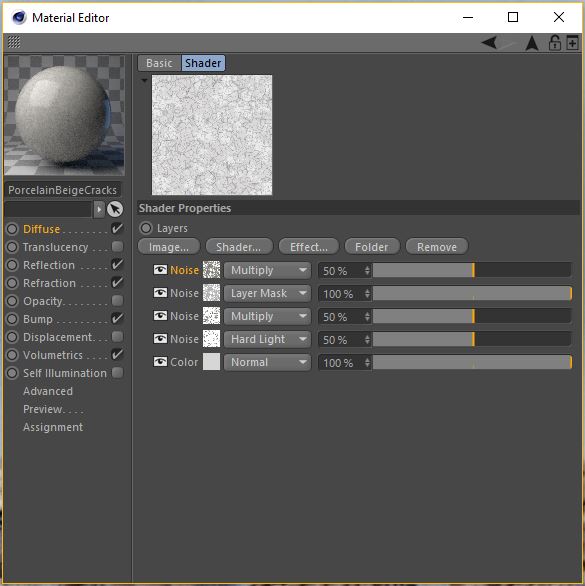
Stacking Noises in Diffuse
Corona Render has a pretty awesome uber shader. For our example we need to take a look at the diffuse, refraction, reflection, bump and volumetrics channels. This seems a lot but we want to resemble the physical ceramic material as close as possible.
First of all we start of with generating the cracks structure procedurally. Within the diffuse channel texture box we first add a layer. This allows us to stack one procedural noise on the other. After Clicking on the layer we add a “Shader…” and choose Color. This will be our base color. On top of that we will start adding a Noise layer. The type will be Voronoi 3. Within the Voronoi we adjust the settings to get the cracked look. In order to add more details we copy the first Voronoi 3 layer and adjust the scale. That allows us to create a dense looking crack structure. Finally we need to adjust the cracks color to our liking. I chose a beige tone for that.
In order to break up the regularity of the base color we set up another layer. This time I chose a Buya noise with a quite large scale and a rose color. Using a layer mask helps to multiply this layer to the base color.
Reflection Channel
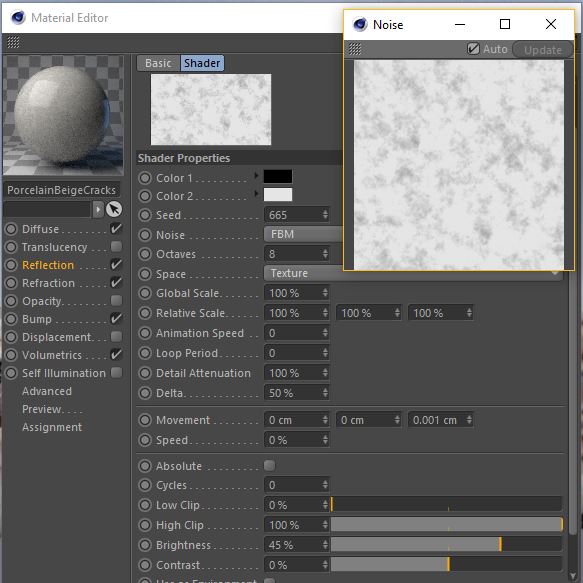
Noise in Glossiness to break up reflections
For the Reflection channel we choose settings for a simple dialectric material. I choose a pretty low IOR of 1.38 to lower the reflectivity at the incidence angle and have crisp reflections at grazing angles. We break up the Glossiness by adding a noise. This time a simple FBM noise will suffice. Settings are kept basic. Adjusting the Brightness level will be necessary in order to avoid complete whites. Complete whites would mean no roughness. We want at least some roughness so I set it to 45%.
Volumetric Scattering
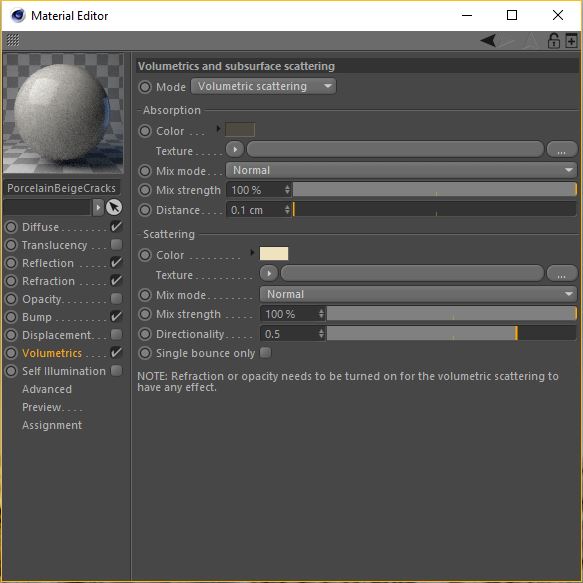
Settings for the Volumetric Scatter
Volumetric Scatter needs Refraction to be enabled. Ceramic is a very dense material. We want to see a glass like hard refraction at grazing angles. That’s why I choose a distance of 0.1 cm. Absorption color is dark greenish brown. Remember that the RGB value is a multiplier for the distance and affects the scattering look. I chose 31 % and got a good resemblance of the real material. Scattering color is a light yellow. Directionality will be set to 0,5 for the inside and -0.5 for the outside material. I want the inside of the model to appear darker and that’s why we don’t want the light scatter back to the camera. The outside of the model needs to appear lighter and more prominent that’s why we want a lot of light scattering back towards the camera.
With refraction I choose an IOR of 1,6 and reduced the value of the color slightly to avoid absolute whites which would not be plausible for this material.
Final Look
With all the settings this is what we get for our material as the final look. In order to get a hint of Bump I copied the Noise layer from diffuse and pasted it into the bump channel. With the material set up we can now move on to lighting. Please remember to adjust the noise global scale to the physical scene size when using another scene for material generation. The size of the crackes depends on the size and scales of your model and scene.
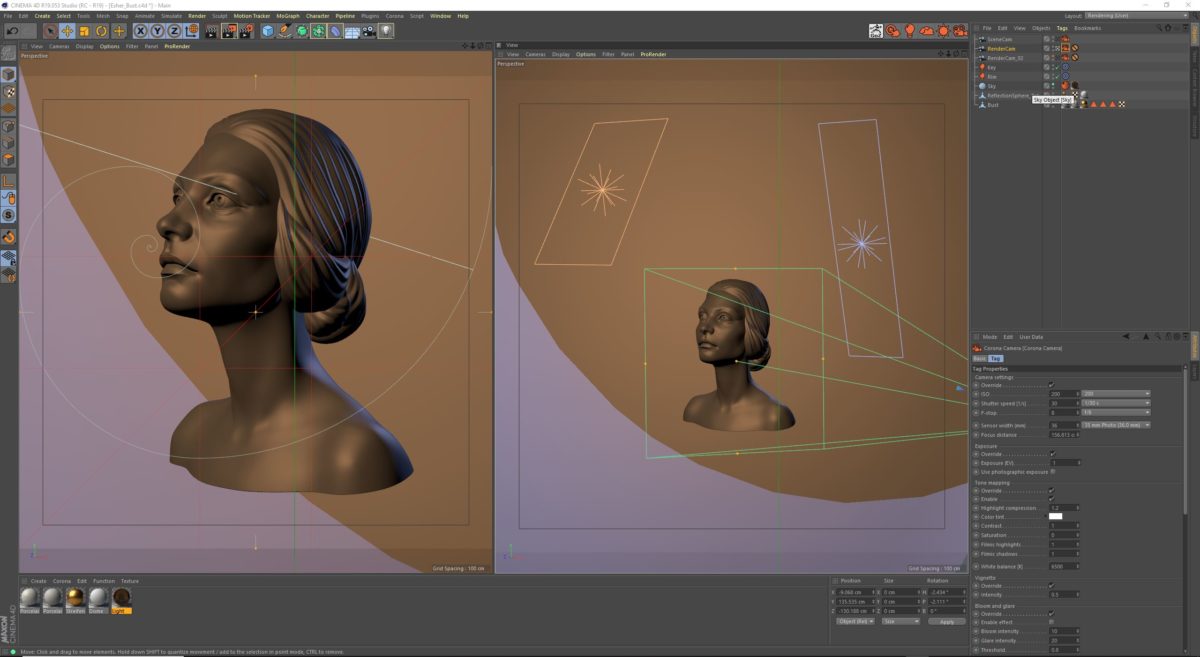
Scene Setup and Lighting
The scene was put together in Cinema4D. I used a basic lighting setup. Fill light is based on a HDRI that provides warm colors and has a light section that results in some shiny reflections. I use a cool rim light to bring emphasize the bust shape. Key light is warm and used to very subtle emphasize the shapes.
After applying the materials the render was good to go. Corona provides many different LUTs. I could spend ours for look development just switching between the different LUT’s.
If you have more question regarding the tutorial or material please feel free to leave a comment.